Monday, January 19, 2015

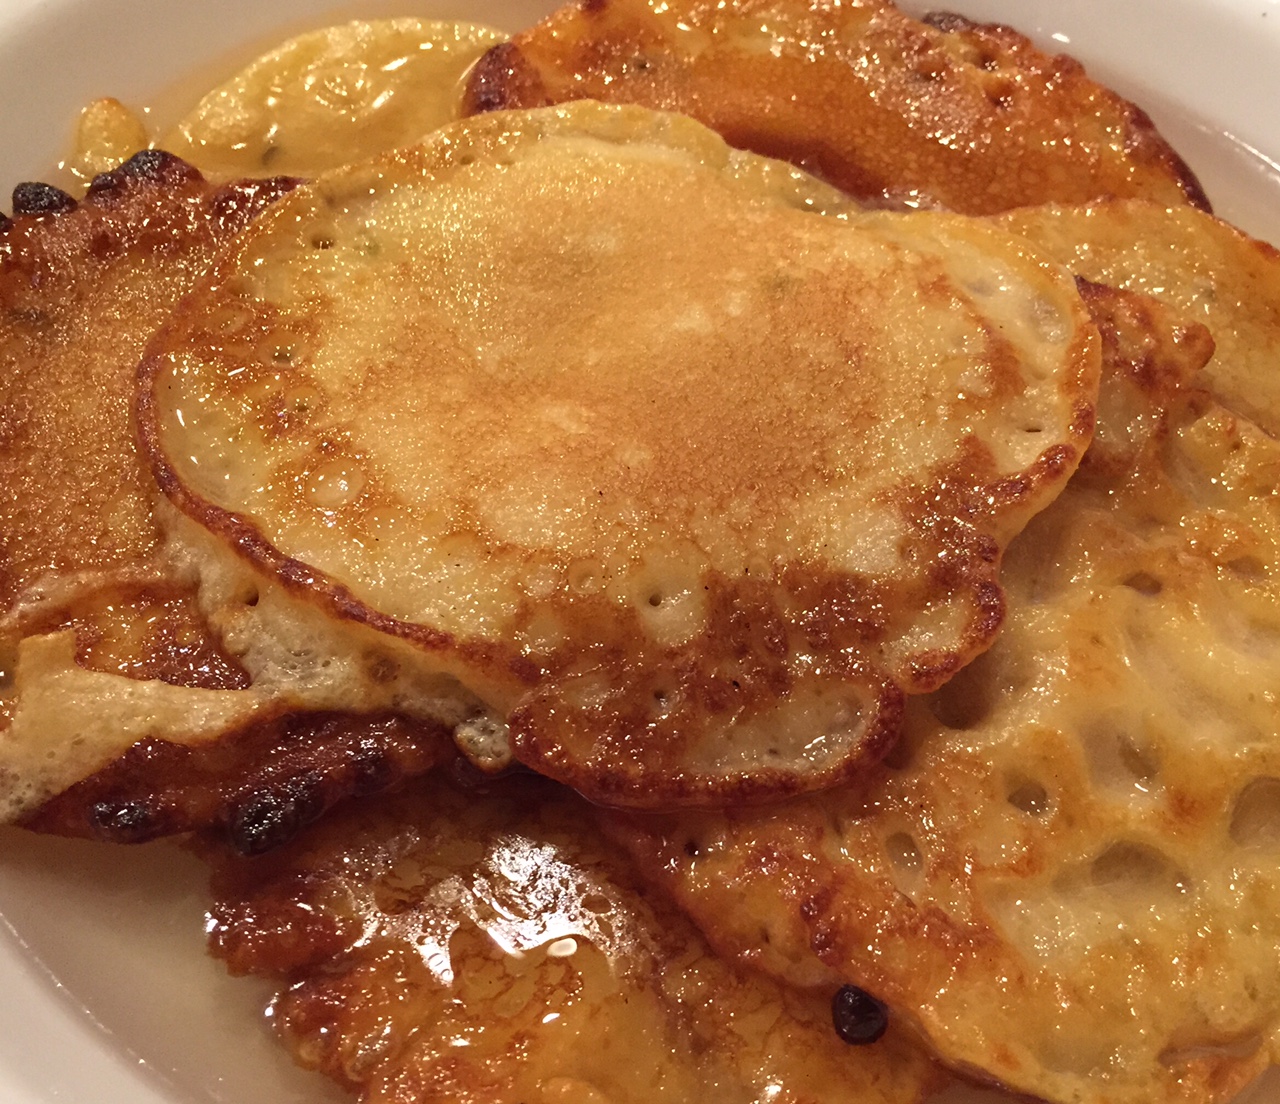
Malpoa for the festive season


Last quarter was hectic, both professionally and personally. While retailers gear up for for the holiday season, software providers need to ensure they beef up resources for their customers. On the personal front, it was the season of parties . For Indians living abroad, the festival actually starts with Navratri/Dussehra, followed by Karva Chauth, Halloween, Diwali, Thanksgiving and Christmas. In short,  it was a pretty festive season and with that, came the potlucks and parties where you get to taste all the traditional goodies.


There is a saying in Bengali “Bangali r baroh maashe tero porbo” meaning “Bengalis celebrate 13 festivals in 12 months”. I am pretty sure the number of festivals and gatherings  is much more altogether than 13. It is true we need just a reason for merry making, be it traditions, a gathering over literature and art, or simply somebody’s birthday or anniversary. We are equally proud of our food, revelries and garments as much as we are of our culture and traditions.

It was also a season to make sweets/desserts for friends and family. For one such gathering, I decided to make a traditional Bengali dish known as the Malpua. Now, the traditional way of making malpua is time-consuming as you have to boil the milk to the right consistency. So, I decided to use some of the easily available ingredients in a grocery store to make this process a bit simpler.

Ingredients:
Evaporated Milk -  1 can
Flour – 1 cup
Cardamom seeds (roughly crushed)  from 4-5 cardamoms
Fennel seeds - 10-20 seeds
Oil to fry
Simple syrup (made of brown sugar and water)

The first step was to prepare the simple syrup by boiling the sugar and water for about 20-25 minutes till it had a sticky consistency.

In a deep bowl, I mixed the evaporated milk, flour and crushed cardamom & fennel seeds with the help of an electric hand-held mixer. Meanwhile, I heated the oil (preferably saffola) in a cast iron wok. Cast iron woks were traditionally used at Indian homes  and I have found that they impart the best taste to any food cooked in them. Many of my friends who have tried them have agreed. Their maintenance may be a bit cumbersome but once you have mastered the tips and tricks on how to best use them, they are quite handy.

When the oil was hot enough, I dropped a ladle full of batter into the oil and fried it till the rims were dark brown and the center was mildly golden. The fried malpua was then taken out of the oil and immersed immediately in the warm syrup. I still remember when as a kid, I would look greedily at a quarter plate fully covered by a single malpua that my mother would make for us during the festive season. We were told not to ask too many in front of guests, lest there was a shortage – a very embarrassing situation for a Bengali host. My brother and I would marvel at our plates for some time, comparing whose malpua was bigger in size and then eventually  give in to devour them.  My dad would always say that malpuas during his times were better and bigger – almost the size of a dinner plate and we would longingly wonder how that must have been. But to dwell in the past – isn’t that intrinsic to human nature? J

Friday, December 12, 2014

Holiday Fruit N Nut Cake - Tis the Season!


The holidays are my favorite time of the year. Even though the days are shorter, I am eagerly waiting for the dark evenings so I can see the beautifully decorated lights everywhere. From Santa Claus, reindeer, snowflakes,  icicles to multi-colored string lights, you get to see lights of every kind. This time of the year also brings fond memories of childhood. Cakes were a must during Christmas and New Year. Since, initially I did not grow up in the city, it was a ritual to bake cakes at home and it used to be a daylong affair. A look at my mom's kitchen and state of mind, you could tell something was baking that day :) But once the aroma of the freshly baked cake filled the house, all stress would go away and we would indulge in the goodies for the next few days to come.

On moving to the city, cakes were readily available at the various bakeries.  To this day, the smell of a freshly baked cake brings a certain nostalgia to my mind. Every year around this time, I want to follow the same tradition at home. And while there is an abundant of good bakeries in the country where I reside, there is a different kind of fun in baking at home. In addition, these become great family/couple projects (hint, hint) :-)

Ingredients:

Pillsbury classic white cake mix - approx. 2/3 packet (approx. 280-300g)
Eggs - 3 (4 if using only egg whites)
Butter(molten)/white oil) - 3 tbsp
Dates pitted & chopped: 15
Dried cranberry: 1/2 cup
Walnuts (cut into small bits): 1/3 cup


The first step was to preheat the oven to 350F. In a blender, I added all the ingredients and mixed all them under the 'whip/puree' setting. If the batter is too thick to be removed from the blender, some water/milk can be added. Note that the batter should not be runny at all. I used a 9" round non-stick baking pan and placed a sheet of non-stick parchment paper on top. Then, I poured the cake mixture from the the blender onto the parchment sheet. This was baked for roughly 45-50 minutes, checking twice in between by poking the cake with a thin skewer to see if the middle portion of the cake was cooked. If the skewer comes out clean (without any batter sticking to it), it is ready to be taken out of the oven and cooled to room temperature. The next morning, coffee tasted blissful with this accompaniment.


Monday, June 30, 2014

Chips n dips for the summer


For one of our summer gatherings, I was wondering what appetizers to make. While the hubby would be grilling all the entrees (there is a reason why women love barbecue), I needed to provide everyone with something to munch on. During grocery shopping at a local store, I saw some hummus and guacamole on the shelves. I was about to almost pick them up when I realized I could make them easily at home. So instead of buying the dips, I decided to buy just the ingredients and the chips. These dips always taste great when freshly made and inspired by those available in some of my favorite restaurants, I decided to give them a try.

Hummus (makes a good enough amount for  7-8 guests)

Chickpeas - one 15.5 oz can
Tahini - half cup
1 large garlic clove (crushed)
Lemon juice - from one lemon
Kosher salt - to taste
Paprika - to taste
Cumin - 1 tsp
Olive oil - 2 TBS for mixing and more for garnish

Added everything in a food processor and blended until smooth. Stored in air-tight container and refrigerated for later use. We got some whole-grain baked pita chips to go with this. Needless to say, I tasted this numerous times thought the making and my kindergartener confirmed the goodness of this dip when she asked for more irrespective of the spice level. "I can handle the jhaal (spicy in Bengali)" is her way of letting me know to what extent she will go if the food is good enough :)

Guacamole (makes a good enough amount for  10-15 guests)

Avocados (ripe, pitted) - 4
Lime juice - from one lime
Green chillies chopped (I used along with jalapeños for some extra kick) - 2
Kosher salt - to taste
Black Pepper - to taste
Olive oil - 1 TBS
Cilantro (you can also use parsley) - 0.25 cup (chopped)
Red onions/shallots - 0.25 cup (chopped)

Mashed them with a fork to have a good consistency. Stored in a container so that it mostly fills up and then covered the guacamole with thick tomato slices to avoid it from turning black. I learnt this trick from the kitchens of a local grocery store. Make sure the container  is airtight and store in a refrigerator. They go great with any tortilla chips -- we bought some blue corn organic chips to go with these and had no regrets :)

Hope to be back with some more writing soon...till then, happy grilling!

Friday, November 1, 2013

Mixed Daal (Lentils) Tadka with Egg Drop


I decided to try out this recipe on one of the foggy fall days in California. I was craving something piping hot with roti and suddenly, I remembered a similar dish my mom used to make for us during winter. I grew up in a relatively colder place and Maa would often make this wholesome meal. During the week, I typically slow cook a batch of lentils to be prepared into some dish or the other. This week, I slow cooked the following lentils overnight.

Ingredients

(for slow cooker):

1 cup - Black whole urd daal (also known as black gram)
1/2 cup - white split urd daal
1 cup - Green whole mung daal
1 cup - Red kidney beans
Salt to taste
Water (covering three fourth of the cooker)

(for tadka):

Onions (chopped) -  1 medium
Garlic (chopped) - 4-5 cloves
Ginger (paste) - 2 tbsp
Oil - 3 tbsp
Fenugreek leaves (dried) - 1 tbsp
Garam masala pwd- 2 tsp
Corriander pwd - 3 tsp
Turmeric - 2 tsp
Red chilli pwd (optional) as desired
Green chillies (as needed)
Egg (as needed)
Cilantro (as needed)
Ghee (as needed)
Salt to taste

The lentils were soft and ready to be eaten next morning. Right before lunch, I browned the garlic and onions in oil in a cast iron skillet. The ginger was added later and the mixture was cooked for about 5 minutes on low heat. To this, I added the dried fenugreek leaves, coriander powder, turmeric and garam masala. Once this was done, I mixed it with the daal in the slow cooker.

Right before serving, I added one egg to the skillet along with cilantro, green chillies and red chilli powder. Then, I scooped about 4 ladles of the daal from the slow cooker into the skillet and sauteed for a couple of minutes. Topped it off with few drops of ghee and this was ready to be served with roti. The hot and spicy daal was great to soothe my damp and cold nerves from this weather :)

I made the daal in a big batch and will be using it for the rest of the week. My kindergartener loves to eat freshly cooked food (read right out of  the pan) and is very particular about it -- not so much in words but in appetite. I have no idea how she figures out  even if it was cooked a day before -- my mom says I was the same way :) Karma, eh? This recipe is mommy's way of tricking the senses ;-). Just need to add some fresh ingredients like cilantro, ghee, green chillies, eggs and saute in a skillet before serving and this will be ready to go.

Thursday, July 25, 2013

Maa's french toast (Indian style)


My friends often ask me what snacks or lunches I provide to my soon-to-be kindergartener. I smile and empathize because that is one question that probably goes through the minds of most iMoms, who have kids of school-going age. There are several things to consider -- is it healthy enough, am I providing a balanced diet, is it going to comeback unfinished and then, the dreaded word, 'boring'.

I am lucky in that I have a readily available list of snacks to pack for school. The credit goes to my mom, who provided me home-made snacks every day when I returned from school. I loved them so much that I would often make them my dinner :) I am sure all my readers will vouch for the fact that kids are the most hungry when they are being picked up from school :) French toast, dosa, paratha, noodles, poori....the list was endless. We never grew up on junk and luckily or unluckily, the way you see it, I have managed to pass on that tradition. We call it 'real' food at our home now :) and it is in high demand whenever the four-year old is super hungry. And guess what, you have to have it ready in an instant! I have often heard of women wishing they had ten hands like Maa Durga but does anyone wish they had ten heads like Ravan? I feel I would benefit more from the latter :D.

Ingredients (makes 4-6 little triangles):

Egg - 1
Wheat bread - 1 slice
Cilantro - 4-5 tender twigs
Onions (prefer red) - one sixth of a medium sized one
Baby carrots - half
Salt to taste
Saffola or other oil to fry

The reason I like this as a snack is because it literally takes 10 minutes from start to finish. In a magic bullet blender,  add the cilantro, onion, baby carrot, salt and egg and blend until the mixture turns to a fine puree. Heat oil for shallow frying. On one side of the bread, apply the egg mixture and let it soak on the bread. When the oil is hot enough, shallow fry with egg side down. Put mixture on the side of the bread facing you and flip.

Now, parents may be concerned about giving fried food to their kids. I, on the other hand, am perfectly fine as long as it is done in moderation and made from fresh ingredients at home. The wheat bread and carrots are my 'healthier' additions to the original recipe. If you have a little of the mixture left, make some little triangles for yourself --  go ahead and indulge :) I tell myself it is a reward for that healthy meal I had last night, or the exercise routine I did day before yesterday or whatever :)

I served this dish as a snack when I picked up my daughter from school last week and the dazzling smile to see the 'surprise' snack was just cherry on top.


Tuesday, July 16, 2013

Oregano-Rosemary Chicken with warm Brussels Sprout salad


For dinner yesterday, I wanted to escape from the mundane. Having had a strenuous exercise session in the morning, I wanted to cook something easy, healthy and tasty. And while thinking about what to cook, a realization dawned upon me. Supermoms of today are not pressurized by anybody else but themselves. We secretly desire to look like supermodels, be the best in what we do in our professional lives, have a sparkling clean home and yet, we want to devote the same amount of time to our kids that our previous generations did. I am not saying that all of these wishes come true at the same time but there is no stopping us from dreaming :) I guess while kids never grow up for their moms, mothers too never see themselves playing any other role across generations -- maybe more but never less.

Oregano-Rosemary Chicken

Ingredients:
Chicken drumsticks - 5
Garlic cloves (large) - 3 (crushed)
Fresh oregano leaves chopped - 1tbsp
Fresh rosemary leaves chopped - 2 tsp
Balsamic vinegar - 1tsp
Olive oil - 1tbsp
Salt & black pepper to taste

Yesterday evening before I picked up my daughter from school, I made some preparations ahead for the family dinner. I marinaded the chicken with all the ingredients mentioned above in a ziploc bag and left it at room temperature. The idea was that it would go in the oven, at 400F, as soon as I was back, for about an hour. Did I tell you moms also love to serve food fresh? :) While making this dish, I realized the key ingredient is freshness -- fresh garlic, fresh herbs and freshly cooked are must. I became so enticed with the smell of fresh herbs while cooking that I am now inspired to grow my own herb garden!

Warm Brussels Sprout salad

Ingredients:
Brussels Sprout (halved) - 15
Red beet (diced) - 1 small
Red onions (sliced) - one-fourth of a small onion
Olive oil - 1tsp
Balsamic vinegar  - 0.5 tsp
Almonds (sliced) - 1tsp
Goat cheese as desired
Salt and black pepper


This salad was easy to make and can serve the purpose of a side dish or salad. In a saucepan of boiling water, I boiled the Brussels sprout until tender (7-8 minutes should do it). Alternatively, you can also soak it in hot boiling water, after turning heat off, for about 30 minutes. The diced beets, sprinkled with olive oil, salt & pepper, were roasted in the oven at 400F, alongside the chicken, in a separate pan. When it was ready to assemble the salad, I roasted some almonds and lightly sautéed the red onions in olive oil. In the end, the Brussel sprouts, roasted beets, sautéed red onions and goat cheese were tossed with a little olive oil and balsamic vinegar. Topped it with the almonds, a pinch of salt and fresh black pepper right off the hand mill.

When assembled together, dinner looked beautiful and eating it made us content. Even though there was nothing Indian about these recipes, the iMom thought it was worth a share for all the supermoms out there while they strive to be the perfect mom for yet one more day.

Saturday, February 23, 2013

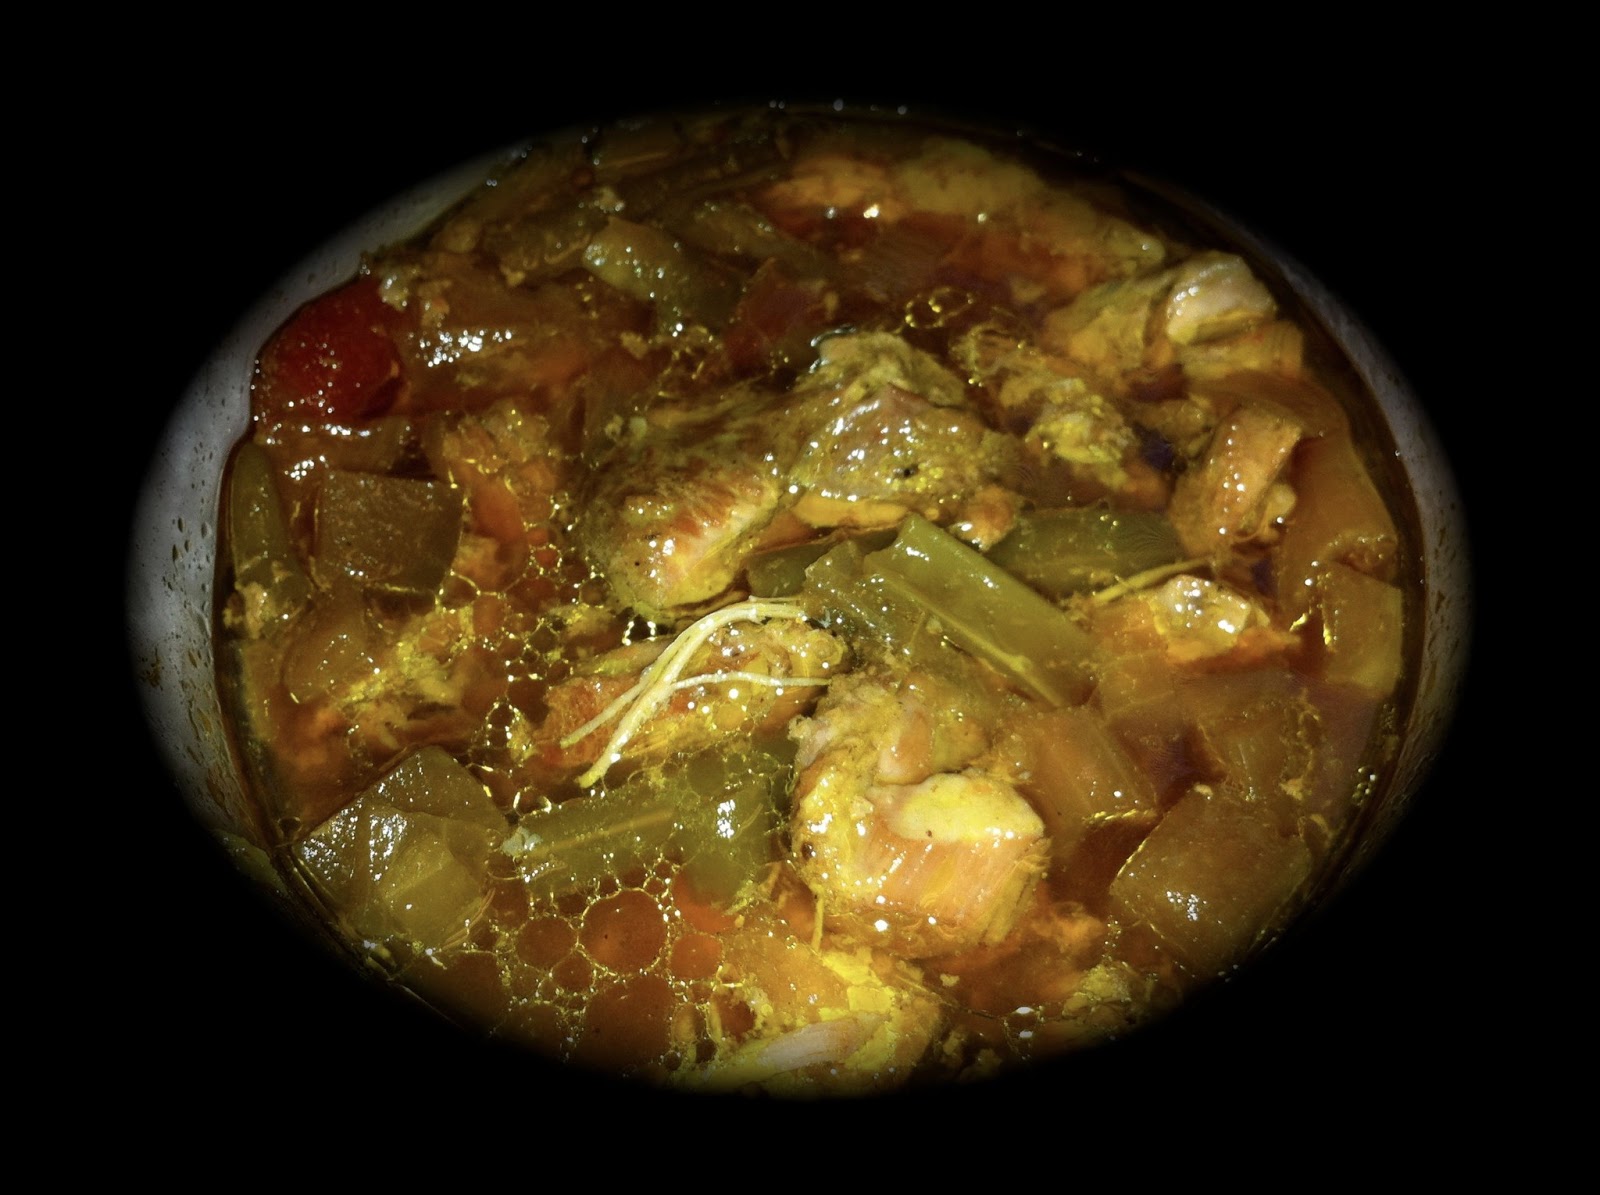
Chicken stew in crockpot


Whenever I have time or necessity, I experiment with my crockpot. I have been making this dish for a long time now (discovered it as a new mom) and have shared with many friends. Never had the time to write it down but when a friend called today and mentioned what a life-saver this comfort food was, I decided to finally pen it down...err I mean, type it :)

I had recently made this dish when I was down with flu and working from home. Yes, you read it right..parents work when they are down with flu. Their vacation/sick days cater to their children's schedules. 15minutes of prep time was all I could afford on a working day.  I decided to share  this recipe with all the iMoms out there with the hope that it will save them some relief from cooking time atleast for a day. Or who knows: maybe more than one day as my friend's child asked her if she could make it again tomorrow!

Ingredients:

Chicken thighs - 6 (bone in or boneless)
Red onions chopped - 1 small
Ginger grated (fresh) - 1 tbsp
Garlic crushed (fresh) - 2 cloves
Organic tomatoes on the vine (diced) - 2
Roasted beets (or fresh golden beets to avoid coloration of stew) - 3 (diced)
Green beans (trimmed and cut into halves) - 12
Dried bay leaf - 1
Cinnamon stick - 1 inch
Garam masala powder - 1 teaspoon
Safflower oil - 3tbsp
Salt to taste
Green chillies - chopped (optional)
Butter (optional) - for garnish

I toss all ingredients in a crockpot and topped it with water to fill upto almost half of the crockpot. The volume of water should be almost two times of the solid after being cooked. I covered the crockpot with an aluminum foil to avoid steam from escaping and put it on high for about 4 hours. By the time I finished my work, popped some pills and brought my daughter back from school, there was a hearty dinner waiting for all of us. You can serve it with rice or bread. If this sounded too simple, please try it before being skeptical.   Time and again this has saved me during crunch time. I am hoping this will be a savior for many other moms too -- note, I did not say working moms only because having tried both, I know moms are working around the clock, whether outside or at home. And at the end of the day, their goal is to keep every tummy in the family happy :)

I took the leftover for lunch next day at work and when everyone stopped by and said, "That smells so good!", the Bengali in me smirked and quietly told myself "Misson accomplished" :)

Monday, December 10, 2012

Deviled eggs - Indian flavors for the Holidays


The holidays  bring with them an amazing time. Because of the cold and early evenings, we admire the lights everywhere. Although most of us fall sick at this time of the year, we appreciate those fun-filled days when we recover. And the one thing that most of us unanimously like about the holidays are the delicacies that we get to cook and eat which we normally wouldn't at other times of the year. The holiday season is also a very busy time for the moms. Winter programs followed by winter break, shopping for all the holiday parties, christmas preparation, the list is endless — I admire each and every mother around me as they perform these tasks meticulously along with the thousand other chores that they do regularly. Today's recipe comes directly from my mother's kitchen and I dedicate it to all the super moms out there. 

During one such holiday get together this year, I thought of making my mom's traditional deviled eggs. The Indian version of deviled eggs is an all time favorite with friends and family. I feel this dish is named appropriately - in addition to stuffing the egg whites, it is coated with breadcrumbs and deep fried — leaving no chance for you to escape feeling guilty or sinful. 

Ingredients (makes 16):

Eggs (hard boiled): 8
Red potatoes (boiled, peeled & mashed): 3
Red onions (chopped) – 1/2
Garam masala – 1 tsp
Green chillies (chopped) - 2
Giner (finely grated) - 0.5 inch
Red chilli powder (optional) - to taste
Salt to taste
Egg (uncooked) - 1
Panko breadcrumbs
Safflower/cooking oil – as needed (for cooking and deep frying)

The boiled eggs were cut into halves and the yolks kept separate. In a nonstick pan, I heated up two tablespoons of cooking oil and browned the onions with salt. To this, I added the ginger and green chillies to cook for another minute. The mashed potatoes and cooked egg yolks were added to the pan and mixed well  along with the garam masala and red chilli powder so it started looking like a stuffing mix. A scoop of this potato stuffing is then heaped on one half of the egg white and shaped like an egg. This is then dipped in whipped egg and coated with panko bread crumbs. Each deviled egg is again dipped in whipped egg and coated with bread crumbs to give double coating. After heating oil to 350F, the deviled eggs are then deep fried for 5-6 minutes or until they turn golden brown.

 As I write this recipe today, dodging the preschooler's tireless questions with some meaningless answers, I realized how a mom works round the clock - physically as well as mentally. I can definitely say my admiration for my own mother has increased several times over the years. I wonder if moms ever retire. So, all the iMoms out there.... pause, take a break, and once in a while, enjoy life :)

Thursday, April 5, 2012

Pakori with Tea : Mood elevators for the flu season


Nothing upsets a mom more than when her child is sick. During flu seasons, pre-schoolers are bound to get  flu at least once. During one such cold and wet winter day in California, where I had to juggle between replying to clients and catering to a sick child, I made this Indian snack for the family.  There was a hidden motive to get my little one to eat something too and typically, salty treats work. 

Ingredients for Pakori (serves 3)

Red onions  (one-fourth) – sliced
Fresh Baby spinach – 1 cup (chopped)
Besan/powdered split peas – 1 cup
Baking powder – 1 tsp
Salt to taste
Green chillies 1-2 (did not add this to the kid’s portion)
Safflower Oil – to fry

While heating the oil in a wok, I mixed the above ingredients with a tablespoon of water until the mixture became sticky like a paste and deep- fried small chunks like fritters.  When the pakoris turned a golden brown color, they were taken out of the oil with a wooden slotted spoon.

Tea/Chai

The tea is a daily Indian beverage and although I am not much of a tea drinker, I find it soothing on gloomy winter days. I find the caffeine in tea just enough to lighten up my spirits  without making me as jittery as too much coffee does. The tea or chai is a perfect beverage for rainy evenings.  Traditional tea making in India involves a lot of utensils – so, when I learnt from a friend about using coffee-maker to make tea, I found this American way of making tea, quite amusing.

 For each cup of tea, I heated half a cup of whole milk in the microwave for about 30 seconds on HIGH. Meanwhile, I added 3 cups of water in the coffee-maker, and instead of powdered coffee in the filter, I added one tablespoon of orange peroke tea and one tablespoon of Darjeeling tea leaf.  While the former (orange peroke) provides a perfect color and viscosity to the tea, the latter (Darjeeling tea) imparts the world-famous flavor of Indian Chai. When the tea had brewed, I added it to the half cup of milk along with sugar to taste and stirred.

The combination of pakori with tea always brightens me up.  The pakori was well received by the little one and the parents happily sipped their tea. Even the thought of this combo makes by smile as I  am writing this blog from  30,000 ft in the air (on a flight) and remembering home .  The cabin crew asks, “What would you like to drink ma’am?” I smile and say “ Tea please” . J

Wednesday, February 1, 2012

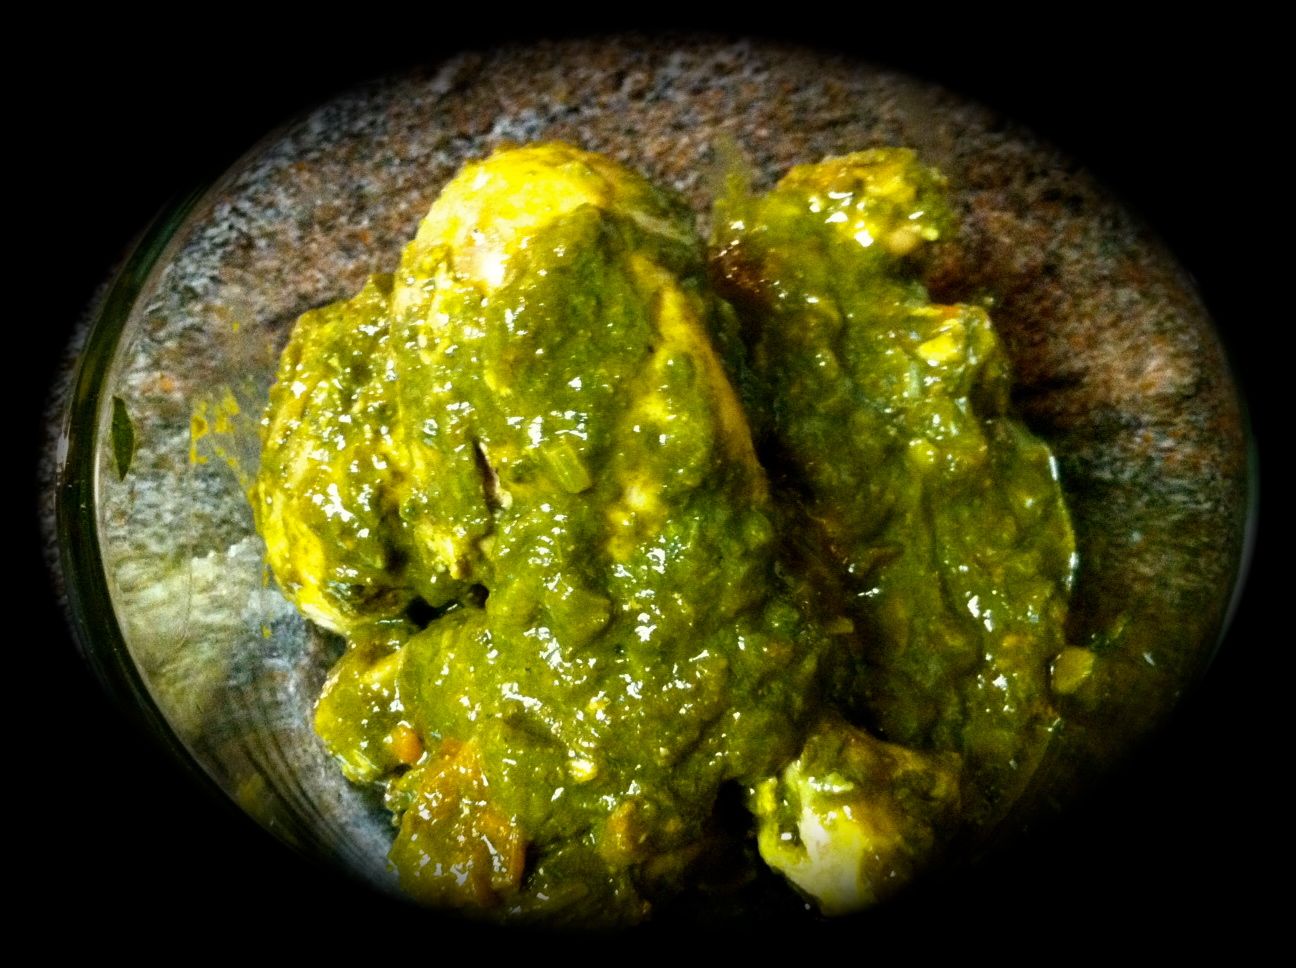
Palak Murgh (Spinach chicken)


As I started writing today, I realized that it has almost been two years since I started this blog. In these two years, I have seen the terrible twos and  horrible threes, although, I have to admit there were some ‘oh so cute’ moments sprinkled in too.

Parenthood has taught me that parents are human-beings, who are not perfect, who have their own mood swings, who are not always right and need not be ‘friends’ to their kids.   This is quite a revelation for me, someone who was culturally brought up with the notion that parents are always right. My own experience as a parent has taught me that often parents will resort to tactics, fair or not, just to make things work. After all, we are trying to survive yet another day, just like anyone else, but with the added responsibility of providing care to the nextgen.

As a mom, I often try to ensure that my daughter has enough greens everyday. Note that it is not an easy task where a three year old pre-schooler is concerned  --  one who often picks the best things from her lunch box or dinner plate and then runs away when not in a mood to eat or finds something else that is more appealing. One of those ‘unfair’ tactics that I apply is when I am trying  to get my child to eat spinach. The spinach leaves, as soon as they become visible, are discarded by her right away. So, I came up with this recipe to get her to eat whatever little spinach I can.

Ingredients:

Chicken drumsticks (skinless) – 8
Spinach – 2 bunches (alternatively, use baby spinach)
Onions – 1 (chopped)
Garlic – 3 cloves (chopped)
Tomato – 1
Turmeric powder– 1 tsp
Coriander powder  - 2tbsp
Black pepper powder  - 1tsp
Garam masala powder (dry ground cardamom, clove, cinnamon) – 1tbsp
Salt to taste
Olive oil – 4tbsp

The night before, I had boiled the spinach for about 15 minutes.  On the day of the cooking, I just pureed it in a blender. I heated the oil in a wok and added the garlic and onions to it. After cooking this in medium heat for about 5 minutes, I added the turmeric, coriander and black pepper powders along with salt and tomato and cooked for another  5 minutes. Then I added the chicken drumsticks and cooked in medium heat for about 10 minutes. The spinach puree was added last and cooked for an additional 30 minutes on medium-low heat – halfway through I ensured that the cover was placed so that there was enough gap to avoid splattering but allow the escape of steam as the gravy dried to a thick consistency. The garam masala was added in the last 2 minutes.

During dinner, my daughter emphasized that there should be no ‘sauce’ on her plate so I gave her the chicken bits with a little spinach smuggled in. As long as she does not realize it, do I care?  For the imom, a full tummy is equal to a happy child, which in turn is equivalent of sane parents at home.


Thursday, December 22, 2011

Catfish nuggets with cauliflower & potatoes


Ingredients


Cauliflower – 1 (cut into big florets)
Russet potato – 1 (diced into cubes)
Catfish fillet – 2 (cubed into nugget size)
Onions – half (chopped)
Garlic – 2 cloves (grated)
Ginger – 1 inch  (grated) or 1tsp of  ginger paste
Garam masala – 1tsp (equal quantities of whole green cardamom, cloves, cinnamon ground in a coffee grinder)
Salt – to taste
Turmeric – 1 tsp (half for the fish and half for the vegetables)
Sugar – a pinch
Paprika – a pinch
Green chillies – for garnish


My friends have often asked me how to make cauliflower tasty and yet not overcook it. The traditional Bengali way of cooking cauliflower is to apply salt and turmeric, and then fry it in oil before making a curry out of it. Needless to say, this method is not suitable for some of us who like to know how many calories they are consuming. So, I experimented with a different method (roasting) that I will share in this recipe today.

As a teenager, one of the few fish dishes that I liked was one named 'aloo -phulkopi diye maacher jhuro' or fish scrambled with potato and cauliflower. The Bengali name is always more exotic, eh? This served as an excellent dish when accompanied with Roti, which the average Bengali loves to eat on winter evenings and believes causes the consumption of  less calories than rice. We can go on and on about this interesting topic of debate but lets save that for another day.

While making dinner these days, I often have to keep in mind the little butterfly at home. Yes, no longer a caterpillar, the little butterfly will often ask me what I am making for her dinner and gets very upset if what I am cooking is not upto her liking. So, I have to come up with creative ways of making her like what I am cooking!

On one such winter evening, when I was preparing to make catfish with some cauliflower and potatoes came the question: "What are you making for me, mamma?" The guilty iMom quickly answered without much thinking: "Fish nuggets. Would like some?" A happy smile indicated yes.

Relieved, I went on to apply salt and turmeric on the catfish fillet, cut them into small cubes, heat a non-stick pan and pan-fry the catfish 'nuggets'. The little princess soon got busy with her plateful on fish nuggets, roti and vege chips (read lettuce). Weird combination? Tell me about it!

Meanwhile, I tossed the cauliflower florets and diced potato chunks in olive oil, salt and turmeric and put it in a pre-heated oven for roasting at 400F for 30 minutes. This left me enough time to cater to my daughter and ensure she ate everything on her plate.

Half an hour later, I returned to my kitchen. In a wok, I heated some more oil, added some crushed garlic and sauteed some onions till they became translucent. I added ginger, the roasted cauliflower and potatoes with salt, turmeric and a pinch of sugar and paprika each. I let this cook by itself covered (occasionally adding drops of water if the mixture got too dry in the wok). When the vegetables were cooked, I added the fish, green chillies, home-made garam masala and cooked for another 5 minutes.

The Bengali was happy that night to eat fish and roti -- not caring much about the calories.

Tuesday, October 18, 2011

It's the Pumpkin season!

Spicy potato and pumpkin with Chana (Indian Chickpeas)


Few weeks back, my daughter picked up a pumpkin during our visit to a farm. Given that she is only three years old, there is no way she is going to be carving that for Halloween. Candies and costumes matter to her as far as Halloween is concerned. For the foodie in me, it seems like a waste to carve and not eat the pumpkin. So, I decided to cook it up this season.  As a child, I had seen my mom make this dish, often during the festive season. The reason was that we needed to eat vegetarian dish during some days and this served as a good dish to go with parathas/puris. In Bengali, it is called 'Kumror chhokka' -- Kumro meaning Pumpkin.

 The pumpkins needed to be prepped few days before the actual cooking -  peeled, cut and diced into small cubes. Before going out for work that day, I remembered to soak some Chana in water.

(Serves 4)

Ingredients:
Pumpkin - one-fourth of a small pumpkin (peeled, cut & diced)
Russet potato -1 (peeled and cubed)
Ginger - 1 inch (grated)
Chana (Indian chickpeas) - soaked in water for about 8 hours
Cumin powder - 1 tbsp
Coriander powder - 1tsp
Red chilli powder/paprika to taste (optional)
Turmeric - 0.5 tsp
Sugar & salt to taste
Olive oil - 2tbsp
Ghee - 1 tsp
Five spices (fennel seed, mustard seed, fenugreek seed, cumin seed, onion seed) - 1tsp
Whole dried red chilli - 1

Since it was a working day, I could not do much cooking before feeding the 3-year old. However,  before starting the dinner with my little princess, I heated up some oil in a cooking pan and added the potato, pumpkin and chickpeas with salt,turmeric,ginger,cumin and coriander . I left this covered on low heat  and went back to mommy duties. A couple of Diego & Dora episodes later, the outcome was a full tummy and a happy child who could now play by herself.

Taking advantage of  the circumstances, I went back to the kitchen and added about one-sixth cup of water to keep the vegetables moist. When everything looked cooked, I added sugar and red chill powder. Two minutes before I was ready to take the dish down from heat, I heated up some ghee, in a separate small pan, and splattered the five spices and whole red chill in it. This imparts a very Bengali aroma to the dish and reminds me of home every time. The roasted seeds & red chilli was poured into the dish along with the ghee. After mixing for a minute, this dish was ready.


Tuesday, August 16, 2011

Semi Home-made Panini


After another tiring day of work, it was time to make dinner and feed the family. Although no one makes moms officially responsible for dinner, we somehow delegate ourselves to this brain-racking chore. To me it is not the physical effort of cooking dinner that seems difficult, but the endless thought processes that run in my brain simultaneously that cause all the stress. It starts when I leave work and start driving: "What should I prepare for dinner today? Maybe rice and vegetables?....umm, no the little one needs proteins too.... yeah, maybe fish for her, I can fry some fish quickly for her...but then what would we eat?... don't feel like fried fish today...etc etc".. and it goes on and on...

After struggling with the little one and her dose of rice, fish and vegetables for an hour, I did not want to look at those anymore. This recipe was a welcome break from my mundane Indian dinner. This is also one of the recipes whose outcome cannot be attributed to the recipe or the cook. It solely depends on the freshness and quality of the ingredients. Although I must admit, if you do happen to get a few words of praise from your better half, go on and take credit ;-)


For all sandwich lovers out there: If you thought fresh yummy Panini is available only in classy sandwich places, read on. This recipe might just be for you.


I got all of the following ingredients from Whole Foods:

(Makes 3 panini)

Sliced sourdough bread - 6 slices (use the slices from the middle to make a decent sized panini)
Pesto sauce as a spread
Butter
Organic Heirloom tomato - 1
Fresh mozzarella cheese (the ones stored in a watery solution)
Basil leaves - fresh from the plant (you got it right, I just bought the whole plant)
Salt & black pepper to taste

To the outside of the bread, I spread the butter and on the inside, I spread the pesto sauce. Butter side down, on one slice of bread, I added 3 slices of heirloom tomatoes, 3 slices of mozzarella cheese, 3 fresh basil leaves and very little salt & pepper. The other side was placed on top (pesto side down). The whole assembly was put on an electric grill and I pressed the lid occasionally but did not shut it completely. The Panini was nice, crunchy and so fresh to taste.

You are probably thinking: "Wait, this is not an Indian dish! What is this doing on iMom's journal?" Here is the reason. During dinner today, I thought I have to share this simple yet tasty recipe on my blog today. Maybe somewhere out there, is a reader who just wants to break free from the mundane dinner. Maybe, some reader out there, works from home sometime and decides to take a lunch break and is craving for a good sandwich but does not want to go to the nearest grocery store. Maybe they will get an idea and make this sometime. If this blog brings change to even one person's life in a positive way, even for a meal, I will consider myself lucky :-)


Wednesday, July 6, 2011

Squash Dolma


Dolma or Dorma is usually a vegetable stuffed with something and then cooked in a gravy or fried. There is the Turkish dish where rice is stuffed in grape leaves. The  dish that my mother makes back home is made from 'Potol', a special squash or gourd that I have seen only in India -- of course we get the chopped and frozen version here but I cannot count that as 'real' food. I have often wanted to make this dish not only because it tastes great but also because is beautiful to look at.

On receiving some comments from my last post, Fish chop (recipe here), that the fish stuffing was  easy to make, I decided to use the same recipe for the stuffing.

To prepare the squash for stuffing, I first peeled out alternative stripes on the squash. This makes the dish attractive as well as ensures the squash is seasoned to the core. After this, I halved the squash, cut a round slice to make a lid and then, scooped out the inside to make a hollow pipe like structure. One end of the squash was left intact while the cut end was sliced one more time to make a lid out of the edge (see picture). The hollow squash was then seasoned with salt.

The next step was to insert the fish stuffing (recipe here) into the hollow squash and seal the covers with wooden toothpicks or small pieces of wooden barbecue skewers. The squash was then deep-fried in heated oil, each side for about 4 minutes until it became slightly golden brown.

We were impressed with the outcome of this experimentation and I thought I must share this with all my friends who miss this dish and would like to make it from fresh ingredients. For the kids though, I am not sure this is going to work -- my little one rejects anything unfamiliar so I have to resort to sneaky ways of feeding her squash. Hey, they say all is fair in love or war -- it is both when it comes to feeding toddlers,  so I guess I am fair :)

Sunday, June 19, 2011

Father's day special: Maacher (Fish) Chop


Many of my friends asked me why I had stopped writing. Surprised, I said I had not but then soon realized that it was indeed more than a month since I posted something! How time flies .... As the mom of an infant, I had foolishly assumed that once I was out of the diaper changing circle, life would be a piece of cake and that it would be easy to go back to my normal peaceful life. How naive was I... I also realized that the writing part is actually more difficult than cooking. I guess moms can hardly escape from cooking... "How will I teach healthy eating habits to my kid if I don't give her home-cooked food?" -- the paranoid mom in me thinks. So, here I am most of the days, rushing around the kitchen frantically after a full day's work to present a decent meal for my toddler.

But the things I cook on those days are not always out of the ordinary that I can write about and even if they are, who has the energy to write when I am asleep (or should I say unconscious) while trying to put the little one to bed. Anyways, while celebrating Father's day, this weekend I cooked a special meal for the toddler's dad and a very dear friend. And one of the star dishes was the 'Maacher Chop (Fish meatballs). I thought I have to share this on my blog!!

Ingredients:
(Make 10-15)

Flounder fillet - 5
Yellow onions chopped - half
Crushed garlic - 2 cloves
Ginger paste - 1 tbsp
Red potatoes (Boiled) - 4
Turmeric - 1tsp
Garam masala - 2tsp
Paprika - 2 tsp
Sugar - a pinch
Salt to taste
Oil as required
Egg - 1
Breadcrumbs - as needed

In an iron wok, I added about 5 tbsp of oil and added the crushed garlic, yellow onions and ginger and cooked for about 4 minutes. To this, I added the fish fillet and tried mashing the fish with a spatula, cooking it at the same time. After cooking the fish for about 6 minutes, I added the remaining spices (Salt, turmeric, garam masala, paprika) and cooked the entire mixture until it was as dry as a stuffing.

To the above fish mixture, I added the boiled potatoes, mashed them and shaped them like short sausages. Each one was dipped in whisked egg and a coating of breadcrumbs was applied. The fish balls were then deep fried and served with mustard dip (Kashondi), the traditional Bengali way. Need I say how it tasted? All you fish lovers try it and let me know!

Sunday, May 8, 2011

My first Rosogolla


It is a little difficult to define 'Rosogolla' - if I say, a traditional round sweet dish made of cottage cheese and immersed in simple syrup, I would be doing injustice. Rosogolla is a tradition of Bengal, is the grand finale to any Bengali feast and is something very close to the heart of all Bengalis, even for one like me who has no sweet tooth. It reminds us of home and unites and provides an inexplicable comfort for those of us living far away.

This weekend I hosted a friend's Shaad (traditional Bengali baby shower). It was a potluck and since I did not do most of the cooking, I decided to make something sweet for a change. I had been intending to try out this challenging recipe for a few years. For those that are not aware, as simple as Rosogolla looks, it is equally difficult to perfect.

Ingredients (Makes 40):

Milk - 1 gallon
Sugar as needed
Semolina/flour - couple of tsps
Lemon - 2.5( big)
Water for syrup
Jaggery (gur) optional
Cardamom - 6


Amidst all chaos around a two and a half year old at home, I boiled the milk and curdled it with the juice of freshly squeezed lemon. I strained the cheese that came out of this as a result and left it in the strainer for a while, squeezing out all the liquid from time to time.

Thanks to daddy who agreed to take the little one out on some errands, mommy concentrated on mashing the cheese with some semolina as long as needed to get a smooth texture. Small amounts of this cheese was shaped in round balls between two hands and the surface smoothed with little water, if needed. It is important that the surface of the balls be smooth to avoid them from cracking later on. In parallel, mommy also prepared some simple syrup (sugar + water + cardamom) in a pressure cooker.

When the syrup was boiling, I immersed the round cheese balls and pressure cooked them for 20 minutes. When 20 minutes were over, I switched off the burner and let them stand in the cooker. I read somewhere that it is important to be not curious and to not let the steam out forcibly. This can harden the rosogolla. I waited patiently (the toughest part) until the cooker had cooled down and put them in a deep bowl of warm simple syrup, this time made of water, sugar and jaggery. After pressure cooking all the cheese balls (I needed to make them in batches), I thickened the syrup and added it to the serving bowl.

Daddy and toddler came back just in time and I quickly drifted from my serene cooking time to sprinting around the house with the toddler's lunch, and soon found myself running around the house tidying it up for the evening. By evening, the rosogollas had the right amount of sweetness in them. Depending on how sweet you like them, adjust the viscosity of the syrup in the serving bowl. Dinner was served with fanfare and my dear friends complimented me on the success.

I did not get to eat any that night because my grand finale was a cranky howling child who did not want the party to end and was very very upset that her friends were leaving.
All other moms will know that I am not being sarcastic when I say "its all worth it" :-) I was proved right when the next morning I received a big hug and was wished "Happy Mother's Day" by the little devil who turned into an angel overnight :)

Wednesday, April 13, 2011

Salmon with Mustard


As a kid, I would hear my mom say how her Bengali friends rave about mustard while her friends from other parts of India found the pungency hard to handle.  As a mustard lover myself, I have always wanted to experiment this ingredient on different taste palates. Last holiday season, when we had some non-Indian friends over for dinner, I decided to take this chance.

Before this undertaking, I cautioned myself a bit. First, I selected a salmon, a well-known fish in the US. I thought this would put my guests at ease and not create a fear of the unknown. Secondly, I decided to strain out the husks from my mustard paste   -- the husks impart more pungency and  cause a bitter taste. Lastly, I decided to omit mustard oil which is commonly used in Bengali cooking in fish recipes.

Ingredients:
Salmon – filet vacuum packs from Whole foods
Onion seeds (a pinch) - optional
Black mustard seeds – half cup
Green chillies – 8-10
Turmeric – 2 tsp
Olive oil – to pan fry the fish and additional 3tbsp
Cilantro for garnish
Salt to taste

I began by soaking the mustard seeds in water and wet grinding the seeds  along with salt, water, 6 chillies, and 0.5tsp of turmeric. The consistency was that of a smooth paste with husks. I mixed this paste with water only to decant the water later. How I love applying physics to my recipes!

After patting the salmon fillet dry and rubbing some salt and turmeric to the fish,  I pan fried both sides to ensure a crispy outer crust was developed but the inside of the fish remained soft. In about 3tsp of oil, I added the onion seeds , the remaining green chillies (slit in halves) ,  0.5 tsp of turmeric and added the decanted water from the mustard paste. When the sauce was simmering, I poured this over the salmon in a baking dish, covered it and baked the fish in the sauce at 350F for about 20 minutes.

Voila fish was ready for dinner – garnished it in style with cilantro. My guests were a bit apprehensive in the beginning but guess what, this dish did become the star of the dinner! So all you people who are scared of mustard, I tell ya: mustard and fish make a great combination, so go ahead and experiment! ;-) 

Thursday, March 24, 2011

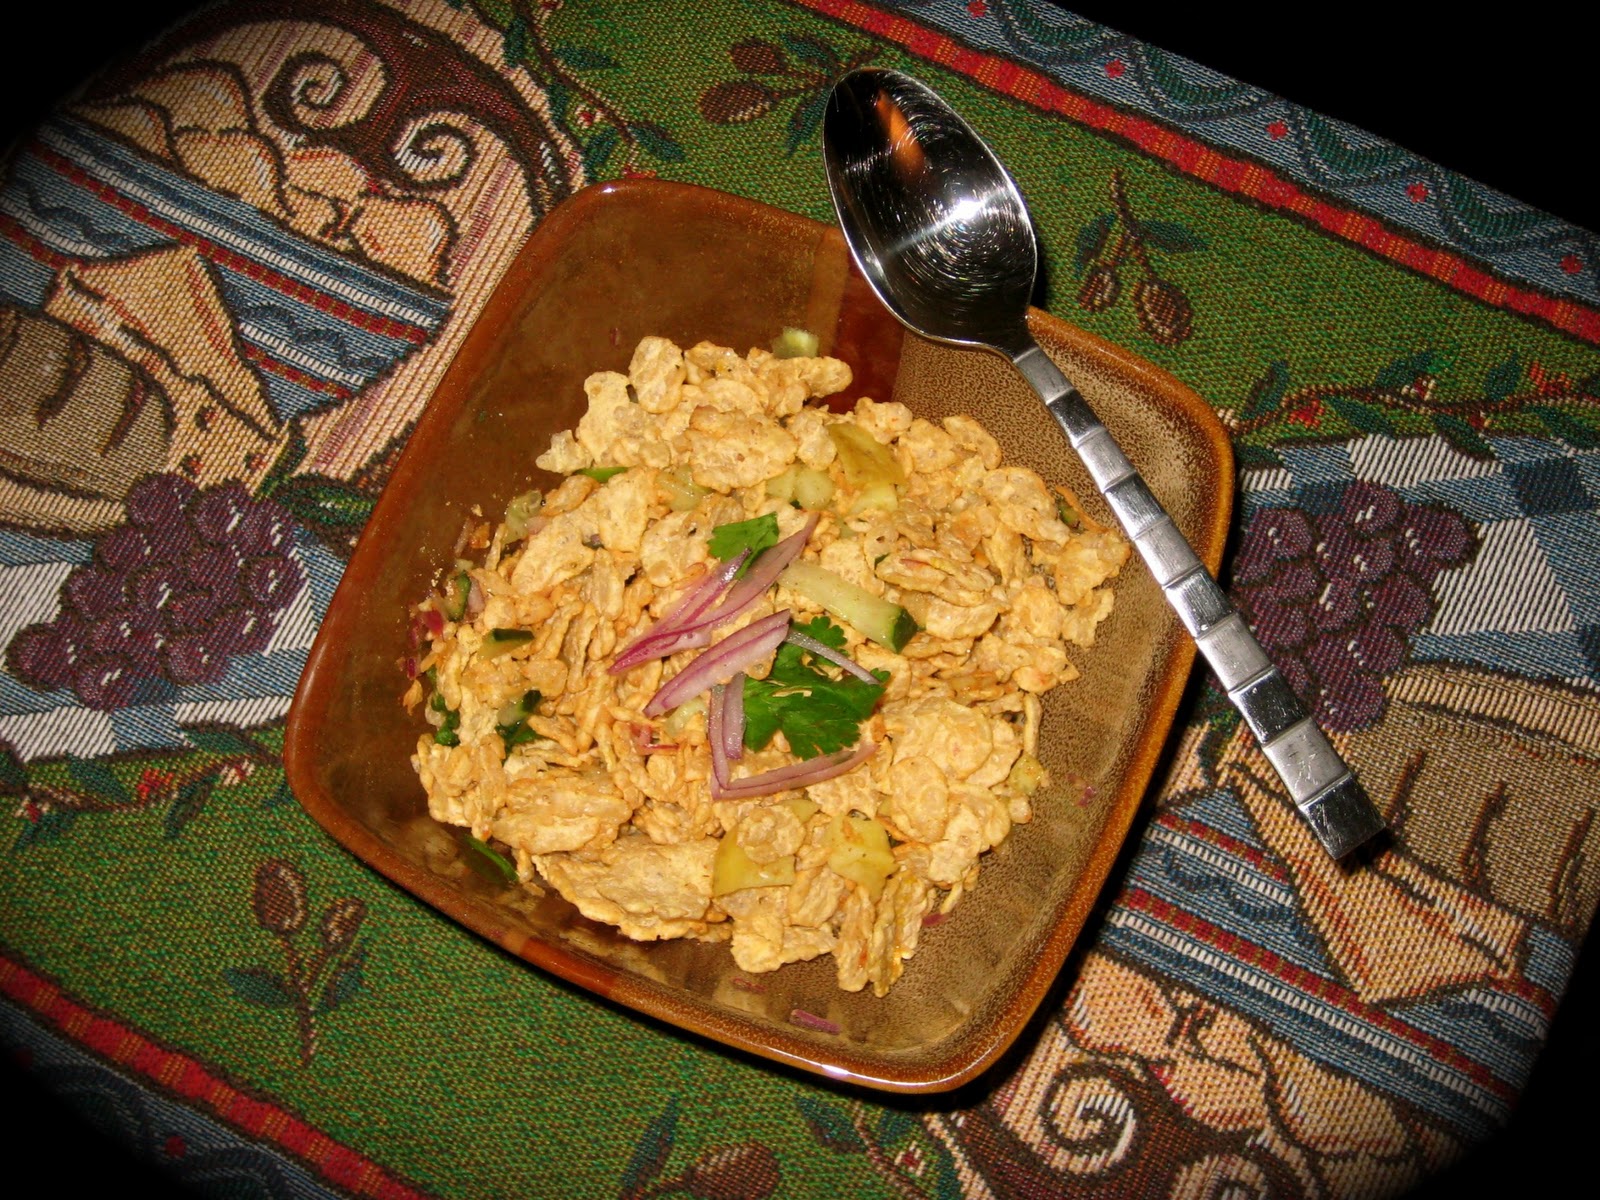
Cereals for lunch!


After a two-month hiatus, I am back to writing. In these two months, I travelled back to my home country where I gained a lot of things- rest, immunity by fighting  sickness, new clothes, pampering of my loved ones and a few more pounds :-) So, once the jet lag was over, I started wondering how I could get myself back in shape before summer is here and those sleeveless dresses come out of the closet. Now, I am no health nut, I cringe at the thought of salad for lunch and feel tired even before I get up on the treadmill but this time I somehow managed to motivate myself.

The first thought that occurred was to start exercising that I had been procrastinating shamelessly for months.  But I also realized that only exercise would not help me lose all the extra baggage that came with the pampering back home. Few days back, I saw Kellogs special K breakfast cereals on my kitchen counter which claimed to lose upto 6 lbs in 2 weeks.  Also, the routine promised me one regular meal. I have to admit I was tempted to jump onto the bandwagon because I could then have my regular meal including rice :-) (Yes, you got it right - I have no shame in confessing I love carbs).

The thought of a healthy diet was all very exciting but at the same time cereals with milk for breakfast and lunch was not very appetizing. Not to mention the lack of my sweet tooth.  So, for lunch I made this quick spicy mixture which tasted great and was healthy as well.  Mixed the following ingredients and lunch was ready. If its too spicy, pair it with some freshly squeezed juice.

Kellog's Speacial K Rice cereal (the flattened ones) or rice crispies- 1 serving
Cucumber (chopped) - 1tbsp
Onions (chopped) - 1tsp
Cilantro (optional)
Green chilli - 1 (chopped)
Boiled potato (one -fourth of a medium sized and then chopped)
Oil - 3-4 drops (I used mustard oil but that may be pungent for many, so feel free to omit)
Salt and paprika to taste
Dry mango powder - a pinch

If you want to indulge further, add some crushed cashews or peanuts and few drops of lemon juice. Bengalis across the world will recognize this as jhaal muri :-)